Thursday, December 14, 2006
Monday, December 04, 2006
Lost Wax Process
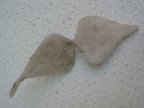
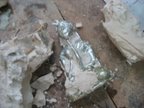
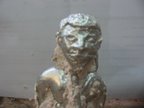
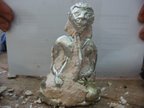
The wax model was encased in a plaster mould and left for a week. The mould was shaved to fit the wax melter in the studio and then I melted out the wax, which took a while as the whole mould had to get hot enough to melt the wax in the head. Then I cut up and melted some low melt metal in a saucepan - Paul says it is primarily tin - it's pretty soft. The liquid metal was then poured in to the mould. I had made wax sprues on the model to allow the molten metal to flow to the head and other difficult areas. Then, the moment of truth: the plaster is broken away and sure enough here is a metal version of my wax sculpture! You can see the sprues, from the chin to the lap for instance, which now need filing off.



Monday, November 27, 2006
Monday, November 20, 2006
Wax Sculpture
 This week I thought I'd try wax sculpture. I have been collecting Buddhist and Hindu images for nearly 20 years and the finest pieces are often created via the lost wax process, whereby a mould is made around a wax model, the wax melted out ("lost") and hot metal poured in. The two metal Buddhas in the photos are from my collection - the larger one is a particularly serene and beautifully crafted Nepali bronze.
 Could I make my own lost wax Buddha? I soon found out that carving something beautiful in wax is quite difficult and that sadly I am not yet very skillful! Given the looming end of term, I decided just to create a recognisable meditating figure and be happy with trying the process. I started off using a harder green wax for the face, although ultimately I used the softer yellow wax for the whole figure. It is interesting to note how different and more pliable the wax becomes once it heats up due to handling.
Monday, November 06, 2006
Latex Moulds from Metal Buddha Sculptures
 After testing that the latex would not stain the Buddha statues - actually it cleaned them up a bit - these 2 Buddhas were painted with progressive layers of latex over a 2 and half hour session. Gaps like under the arms of the metal sculptures were filled in with small bits of wax. Without this the mould would not come off easily as the latex would form a loop around the shoulders. By the following week the latex moulds were ready, carefully peeled off and then cast in plaster. There was an odd air bubble but the result was quite good generally. In the pictures below you can see from left to right: the metal sculptures, the latex mould and the plaster cast from the latex mould.

Monday, October 30, 2006
Casts from Clay Imprints
Monday, October 23, 2006
Woodcarving


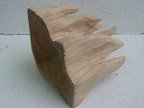
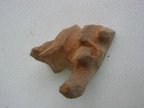
There was a cube of lime wood kicking around the studio which someone appeared to have practised their drilling skills on. Paul gave it to me to try out some wood carving. I started by carving out the drilled holes, originally hoping to make a statue of some kind. However the drill holes were pretty deep so I ended up with a mountain range! It's quite hard work on the right wrist and hand using the carving tools. I then spent quite a while more over the weeks carving out the inside of this model.
Monday, October 16, 2006
Latex Moulds

 Also in Week 3 , I made a rough clay sculpture of a devil kind of figure, purely to test making a latex mould. This involved painting layers of latex every 20 mins or so onto the clay model and finally putting pieces of scrim into the latex to strengthen it.
By the following week I had a mould from which I then cast a devil in plaster, gaudily painted later at home I am afraid.
Week 3: Clay
Monday, October 09, 2006
Week 2: Plaster on Wire

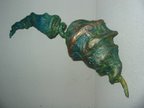 Week 2, I took one of the wire sculptures I had made in Week 1 and wrapped it in gauze impregnated with plaster - I am sure there is a posh word for that but I have forgotten it. Anyway, I bound the armature wire curves in this material, which is very similar to the plaster you would put on a broken limb. It dries and hardens quite quickly. I took it home and painted it in sea blues and greens and golds. I might make a bigger version of this piece; I like it.

Monday, October 02, 2006
Week 1: Experimentation

In the first week I experimented by just making things with any of the materials that Paul gave me to try out - mainly wire, waxes and clay. I seem to be into spirals right now. This armature wire has a really nice feel to it and is easy to bend and form.
Then I made something of a similar shape in clay which was later fired in the kiln. It broke but I stuck it back together using milliput, a strong moulding clay and adhesive.

I tried these three different waxes. White is candle wax, the others are harder waxes although the yellow is softer than the black. The yellow wax is stained by the clay I still had on my fingers - is this croissant edible?
and how about melting some wax and making a shape or dipping your spiral in it? Hmm the Turner Prize may have to wait but it's all a process ...


Oh I just love playing with bits of wire it seems
Monday, September 25, 2006
Starting Out
I have been doing a Mixed Media Scuplture course at the Mary Ward Centre since September 2006. This blog is to record my experience of the course. My goal at the outset is to discover and learn as many different techniques as possible so that I will get a good idea of what might be possible for me as a sculptor. I have been making things from birthday cards to cardboard castles, fimo animals to concrete mazes and costumes for drama since I was a child but don't actually know many formal techniques ... so here goes. The teacher of this course is Paul Badger, he sounds interesting and is a 6ft 8in man on a bike.
Subscribe to:
Comments (Atom)
